
Candles and Toilet Paper Rolls???
What on earth am I talking about....
I can not remember were I saw these being made, but I know someone inspired me.
They made these simple, but cute fake candles for Halloween and I thought, what a great prop to decorate inexpensively and have fun making them with the older kids or friends.
The instructions were simple but I noticed they didn't last very long, and they tumbled easily, so.... I came up with my own way of making them, and they will last as long as you want them around.
Be as creative as you want. Use the on your Altar, around you home, for the holidays and wonderful for Samhain.

The wee ripper dolls are made of clay and that will be another crafty day. These were inspired by Penny Parker.
PLEASE NOTE, before we even start, remember that these are only to be used with battery operated tea lights. NEVER, NEVER put a real candle with an open flame in them.
One more point for you to consider, you will be working with a hot glue gun, so I do not recommend this craft for little ones, unless they join you during the painting instructions.
The recycling part consist in saving the disposable tubes of toilet paper, paper towels of even gift wrapping paper. It all depends on what size candle you want to make. Here, I will show you a couple of different ways you can do this so you can customize your own.
The first instructions can be as simple as you want them to be. The second instructions are with Paper Mache, which I personally prefer but, if this is your first time making these, stick to the first instructions and then venture further.
I am only sticking to 2 ways for now. Yes, there's more ways and ways were you can use real candles, but that will be some other time.
Ok, here's what you will need to start.

Toilet Paper, Paper Towels cardboard tubes
1 piece of carton (you can use a piece of box you don't need, like the lid)
Masking tape
Battery Operated Tea Lights
Small paint brushes
1 sponge brush
Mod Podge
Rocks, for however many candles you are making and make sure they fit under the tube
2 good glue guns
1 big bag of glue sticks
Acrylic paints (choose whatever color theme you would like)
1 disposable paper plate
1 small dish for Mod Podge
1/2 cup of water
1 can of Clear Matte Sealer Spray
Plastic or paper to protect your table

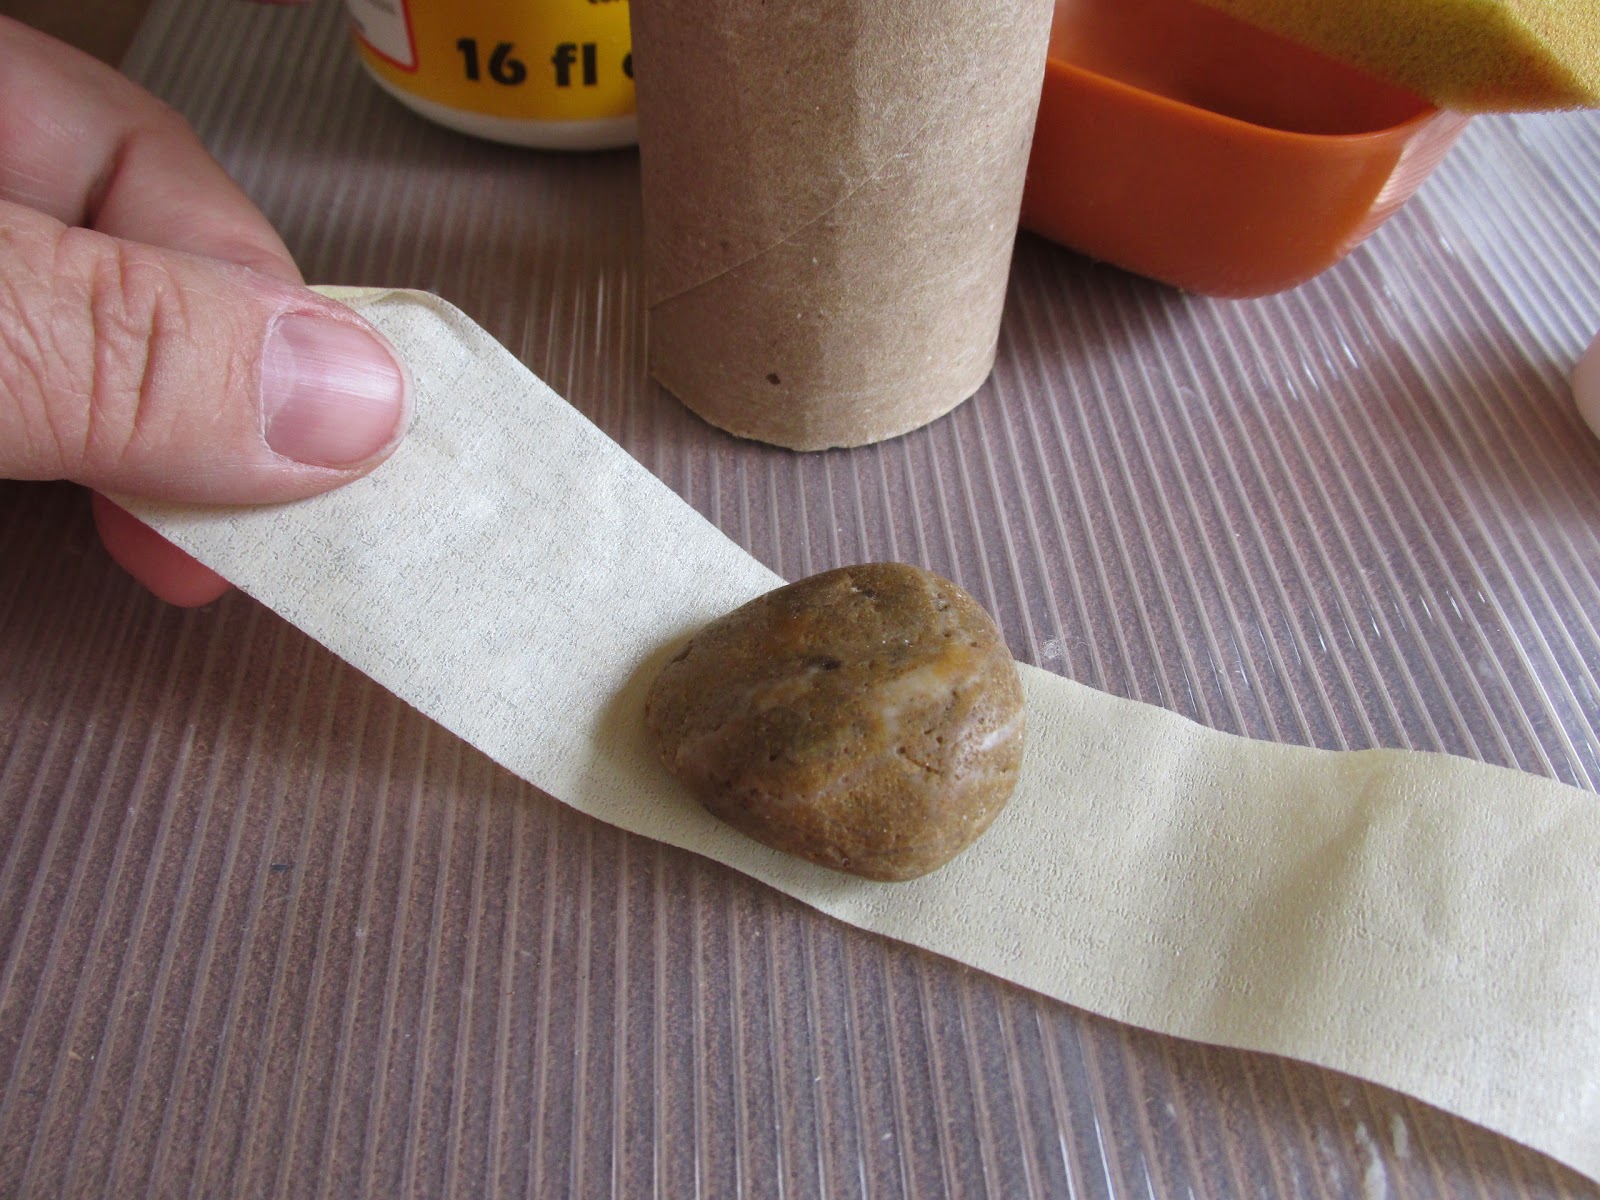
With sticky side up, place the rock in the middle

Place the paper tube right over the rock.

and secure the tape on both sides of the tube.

Place tube on carton and draw a circle, 1/4" to 1/2" larger than the circumference of the tube. It does not have to be perfect. This is your base so the candle won't tumble.

Cut it. Again,... it's better if it has a raged look and not perfect.


Load the bottom with glue, (the side that has the rock) stand it on your cut circle and seal it with more glue around the base.
Just picture how real wax would fall down to the base. That's the basic idea, but at the same time it's giving you a solid strong base.

Now, cut another piece of tape a little longer than before, and tape one side to the opposite side of the paper tube (which will be the top of the candle).

Carefully, continue taping a little bit on the inside, leaving one side untaped.

While holding the untaped side, place the tea light on the inside and gently push it down until the edge of the plastic does not show over the edge of the paper roll. I like to push it a little deeper for a more natural look.

Once you feel it's deep enough, go ahead and secure the other side of the tape to the paper roll.

I like to give it a little shape by tearing a couple of small pieces right of the top. Kind of like a natural candle would concave on one side and then start dripping......

Retest your tea light after you tear those pieces, just to make sure it's still deep enough and not showing. If you cut to much and it does show, it's ok, just untape the one side and push it in a little more.

This is an optional step and you do not have to do it, You can simply skip and go directly to drip gluing.
**********************************************
If you would like to add more dimension to the candle, you can, at this point paper mache, or just use more tape, pinching and creating ridges and folds. Just make sure you don't do any sideways, it wouldn't look natural.

You can even build a little bit up on top.

Yes, I know it looks hideous.. but you will also use less glue. This project takes a lot of hot glue, so be prepared with at least 5 sticks per candle, and I use the bigger glue guns, the small ones are way to time consuming and it will take 4 times the amount of sticks.

Make sure all the tape is sticking and there's no loose ends.
Place the candle on a paper plate. This is so you can easily turn it while you apply the glue.

Time to play with the hot glue gun. Starting at the top, squeeze the hot glue and let it drip naturally down the sides, being careful to not get any on the inside.
If you do get glue on the inside, just wait until it cools to the touch and remove it, otherwise your tea light will not fit.

Use the paper plate to turn as you squeeze the glue.
You can carefully add a little extra on top to give it more dimension, it's up to you.

Make sure to get the edges you tore off and do a little extra drips on these.

Let the glue cool and dry for a little, and refit the tea light to make sure it still fits. This is when you'll know if you got to much glue on the inside.

Make sure to remove all the glue hairs before your next step.

Now that the base is all done, lets make the candle stronger, so it will last you for years to come.
Pour some Mod Podge into a dish, and add a little bit of water to thin it out, about 1/2 the water to Mod Podge.

Mix the two well with your sponge brush, or other brush.


Let it air dry well. I like to place it outside in the sun. If its warm, it will take about 10 to 15 minutes.

After it's dry,.. again try the tea light to make sure it still fits.

Using a dark acrylic paint, paint the candle not missing any spots, include the inside were the tea light goes. I happen to have some black spray paint, so that's what I used for my base and it's a little faster.

Use Scotch-tape or Blue tape (it dose not stick much) and tape the flame part of the tea light.

Paint it the same color as you base and when it's dry remove the tape.

Now it's starting to take shape. Some folk will leave it as is, just with the spray paint. That is also up to you. I like to complicate things (lol), and see what happens at the end, hehehe.

Choose whatever colors you want your candle to be. It's best to have a dark, a medium and a light color within the same pallet. Or you can mix and play with your colors. I used browns, mustard yellow and orange for mine. Be creative. I made one with a gold base (spray paint) and then touched up all the drips with copper and metallic black. I was beautiful.

My colors don't look true on these photos, but the first color is actually brown. You want the base darker than the drips. Paint the drips last with a smaller brush, so you don't drip into the darker color.


Don't forget the inside.

Add whatever final touches you think it needs and make sure the paint is completely dry.


Now below you can find a different way of making these with paper mache and still using the rolls as a base.
*************************************
Papier Mâché Toilet Roll Candles
The only extra ingredient you will need for this is, 1" strips of paper from paper bags, magazines, news paper etc...
There's a few different ways of making Papier Mâché mix. One involves cooking flour, water and sugar and the other, regular Elmer's glue and water.
Here's a great website if you want to learn a little more about it.
http://www.ultimatepapermache.com/paper-mache-recipes
We'll use white glue with this recipe. My ratio is 1/2 parts of water to glue. If you feel is still a little thick, don't be afraid of adding a little more water, but not to much.

This time I would like to make the candles a little thicker and taller.
 Using the same rolls I will
 open them up and glue them
together to make them
whatever size I want.

Open all the rolls you think you'll need. I am using 4 toilet paper rolls for 1 fatter, taller candle.

Put them together as shown, about 1" apart or more.
Using the glue gun, dab some glue on the edges, enough for them to hold together.

Re- roll it and shape it. Follow the same instructions as above.

Cut several strips of paper

Use a larger flat dish to mix the glue and water so you have the space to soak the strips of paper.

Mix them well

Brush both sides with the thin glue mixture and keep them moist while you work.
Cover your table with plastic bags or something you can dispose off. Or you can use a paper plate.
Don't forget to put loose tape on the top and fit the tea light. Follow the instructions for the first set of candles above. Make this one a little lower, or deeper.

At this point you can wear gloves but it's not necessary, this washes easily.

Strip by strip, start covering the whole surface of the candle vertically, folding the top part in and over the tape that will hold the tea light.

Form folds and ridges while the paper is wet.

Continue adding strips and overlapping, until the whole candle is covered.

Take it outside and let it dry for a few hours.

After is completely dry, apply glue and let it drip like you did with the first instructions.

Remove glue hairs

Cover the whole thing again with Mod Podge and let dry again.

Paint as per first instructions


I used a little crackle on the larger one, just for fun.


Hope you enjoyed our little project. Make all your creations magickal and fun!
Blessed Be
No comments:
Post a Comment